Home
The Landing page of Insightloupe provides an introduction to the platform, the Evalueserve team and an overview of the projects for a particular client. This page can be customized to reflect the overall story of the studies conducted for the client along with a list of all their projects. Users can navigate to different documents and reports across all projects as well as access the key contact details for the team working on their deliverables.
Home Page Banner
The home page banner of Insightloupe can be used to provide engagement-related details to anyone who is accessing the platform. It is a customizable banner which consists of text, image, and client logo widgets.
Text Widget
In edit mode, the text widget will have a default heading and text that can be edited as follows:
- Click on the Edit home button to enable edit mode..
- In the edit mode user can edit the heading and the description below the heading.
- The changes done by the user will be saved automatically.
Image Widget
This widget can be used to provide an infographic or any image relevant to the client or their projects. Users can upload image from the library that are already uploaded by the user or can upload image from their desktop. The image widget will have a default image that can be edited through Edit Mode as follows:
- Click on the Edit home button to enable edit mode.
- In the edit mode click on the edit image option.
- Select an image from the library or click on upload image option to upload image from your desktop.
- Click on save button.
Client Logo Widget
Users can upload image from the library that are already uploaded by the user or can upload image from their desktop.The client logo is an optional widget that will not appear on the banner if no image is added to it. It cannot be deleted even if unused.
- Click on the Edit home button to enable edit mode.
- In the edit mode click on the edit image option.
- Select an image from the library or click on upload image option to upload image from your desktop.
- Click on save button.
Project List
The project list widget will have a list of all the projects to which the user has access. The projects are distributed among the folders that are created by the users. A folder of All Projects which will consist the all the projects created on Insightloupe.
The project list will have individual project cards that will consist of the Project name, Starting date of a project, and its last modification date. Clicking on the project name will redirect the users to the Project Home of the project. The Project card will also display the total number of published reports and the various document types that have been used for the study. Clicking on each will redirect users to the relevant modules. The project card will have a Manage button (visible only to manager and analyst users) through which users can access the Manage module.
Add Folder
Addition of new folder will allow user to add his project in a seprate folder for better categorization.
Follow the steps provided below to create a new Folder:
- Click on the Edit home button to enable edit mode.
- In the edit mode click the ADD FOLDER BUTTON and then add the name of the folder.
Renaming or Deleting Folder
Follow the steps provided below to create a new Folder:
- Create a new folder with the updated name
- Move all projects from the old folder to the new folder by dragging the projects using the drag and drop icon.
- Refresh the page and the old folder will get deleted from the folder section.
Cross Project Patent Family Search
If a particular patent is available in multiple projects and the user wants to search all projects where this patent is present, this search can be used.
- Click on the Cross Project Patent Family Search button on the Landing page.
- In the pop-up window enter the patent number that you wants to search across all the project.
- The result of the search will display the project name with that patent number.
Search Project
Using the search option, users can look for projects. Real-time search result will be provided based on user search. Users can use the project name as a search criteria to find projects. Search will also filter out the folder in which the project is present.
Key Contacts
Key contact is used to introduce the Key representative to anyone who is accessing the platform.. Users can add key contacts with different roles like account manager, customer support manager, project manager, etc.
Add Key Contact
Follow the steps provided below to Add Key Contact:
- Click on the Edit home button to enable edit mode.
- In the edit mode click on the add contact button to add key contact.
- Enter the name, email, role, and image.
- Click on the Save button.
Edit Key Contact
Follow the steps provided below to Edit Key Contact:
- Click on the Edit home button to enable edit mode.
- Select the Key contact and click on the edit option.
- Now the user can edit the required field.
- Click on the Save button.
Delete Key Contact
Follow the steps provided below to Delete Key Contact:
- Click on the Edit home button to enable edit mode.
- Select the Key contact and Click on the delete icon to delete the key contact.
Header Navigation Elements
Additional options are accessible on the header navigation of Insightloupe, and they can be accessed both from within the project and externally:
- What’s New
- Online Help
- Order More Services
- Ask the Consultant
- Notification
- My Profile
What’s New
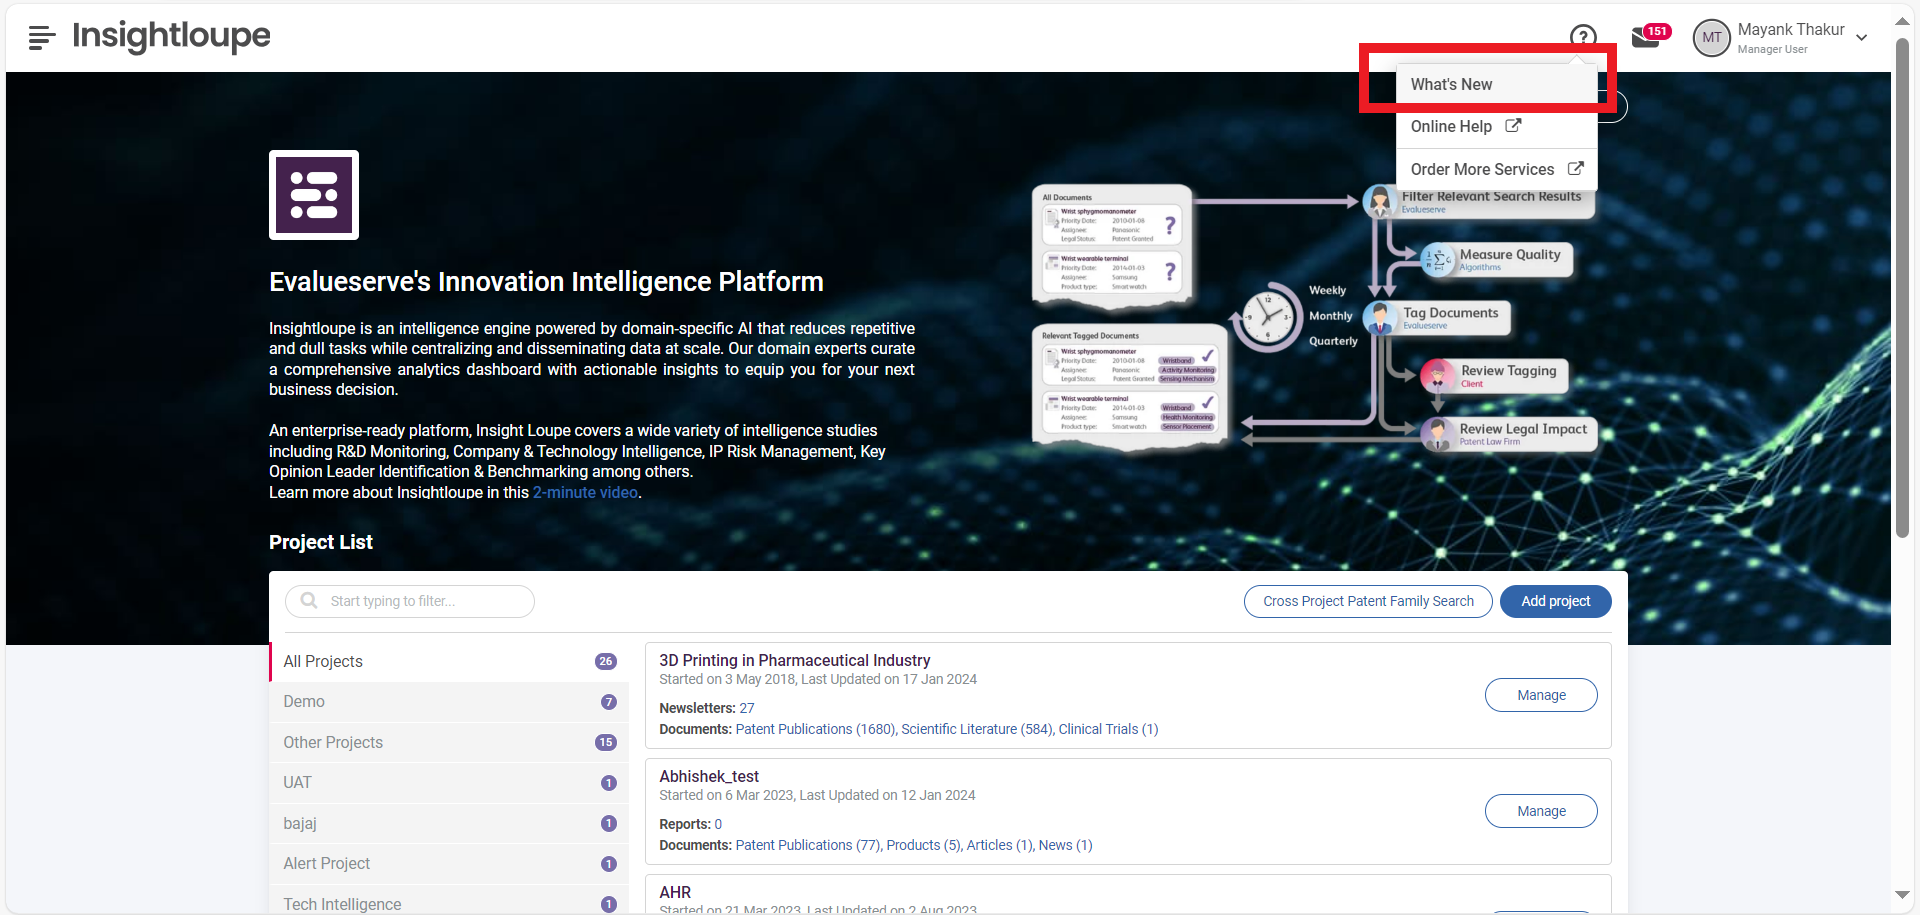
The What’s New section on Insightloupe provides users with a summary of new features released every month along with the respective reference videos. To navigate to the What’s New section, follow the steps provided below:
- Click on the
Question markicon. - Select the
What's Newoption from the list of the options provided.- Users can view new features released in a particular month by choosing the relevant option from the dropdown.

Online Help
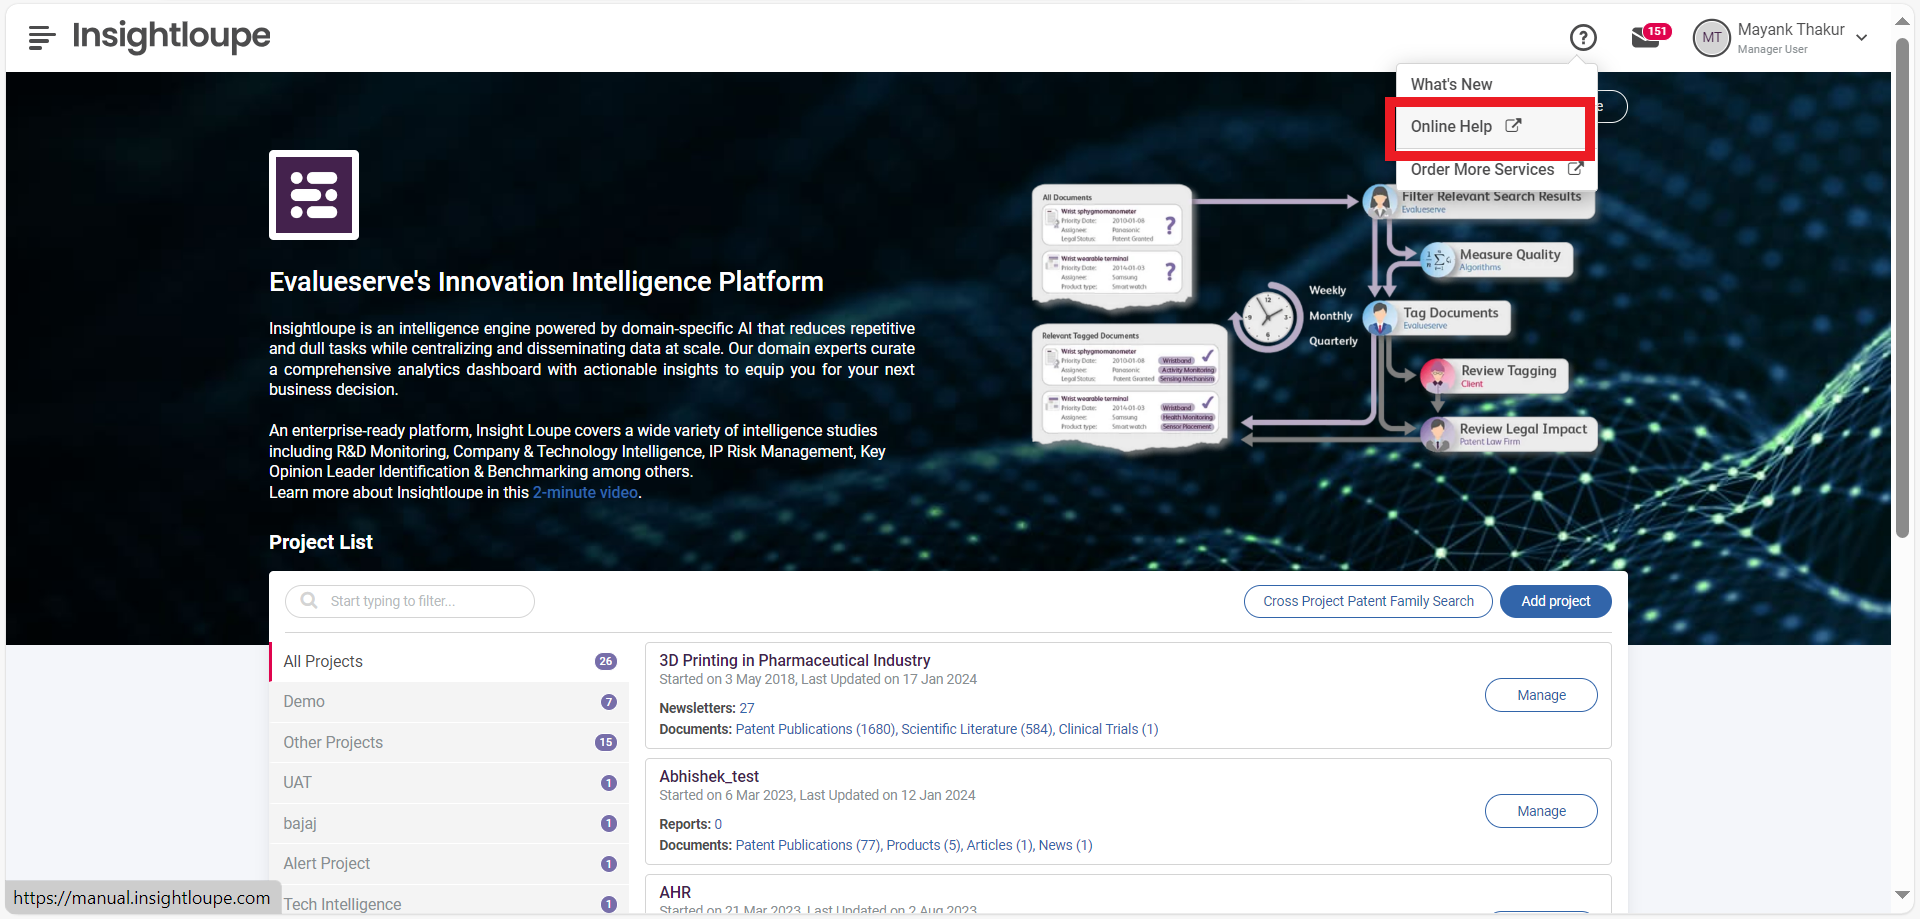
The Insightloupe user manual can be accessed through the Online Help section. The manual comprises of comprehensive information and instructions on different modules and their features. To navigate to the User Manual follow the steps provided below:
- Click on the
Question markicon. - Select the
Online Helpoption from the list of options provided which will redirect users to the user manual.

Order More Services
This option will redirect the users to the searchstream platform which is a digital sales platform that serves as a one-stop solution for clients, allowing them to order various in-depth services in minutes. On the platform, users can place orders for services such as patentability searches, invalidity searches, patent watches, and freedom-to-operate (FTO) searches. Additionally, SearchStream offers an all-in-one solution for managing proposals, reports, and invoices, making it a convenient and streamlined platform for clients.
Ask the Consultant
This feature enables the client users to communicate their project-related queries with the Evalueserve analyst. To navigate to the Ask the Consultant follow the steps provided below:
- Click on the
Question markicon. - From the list of options provided, choose
Ask the Consultant.- The
Ask the Consultantbutton will only be available within the project if it has been enabled in the project settings for that specific project.
- The
- Type your query into the text box in the pop-up window, attach the file if necessary, and press the send button.
Notifications
The Notifications section on Insightloupe displays all the project-related notifications (such as data upload result summary, assigning of Data Enrichment and Data Collection task, subscribe/unsubscribe to alert, etc.) to which the users have access. To navigate to the notification section users can click on the message icon on the header.
Further using the filters available, users can search for the specific email notification they are looking for based on the subject, sender, recipient, and start-end date. For more information please refer to the alert notification section on Alerts module.
My Profile
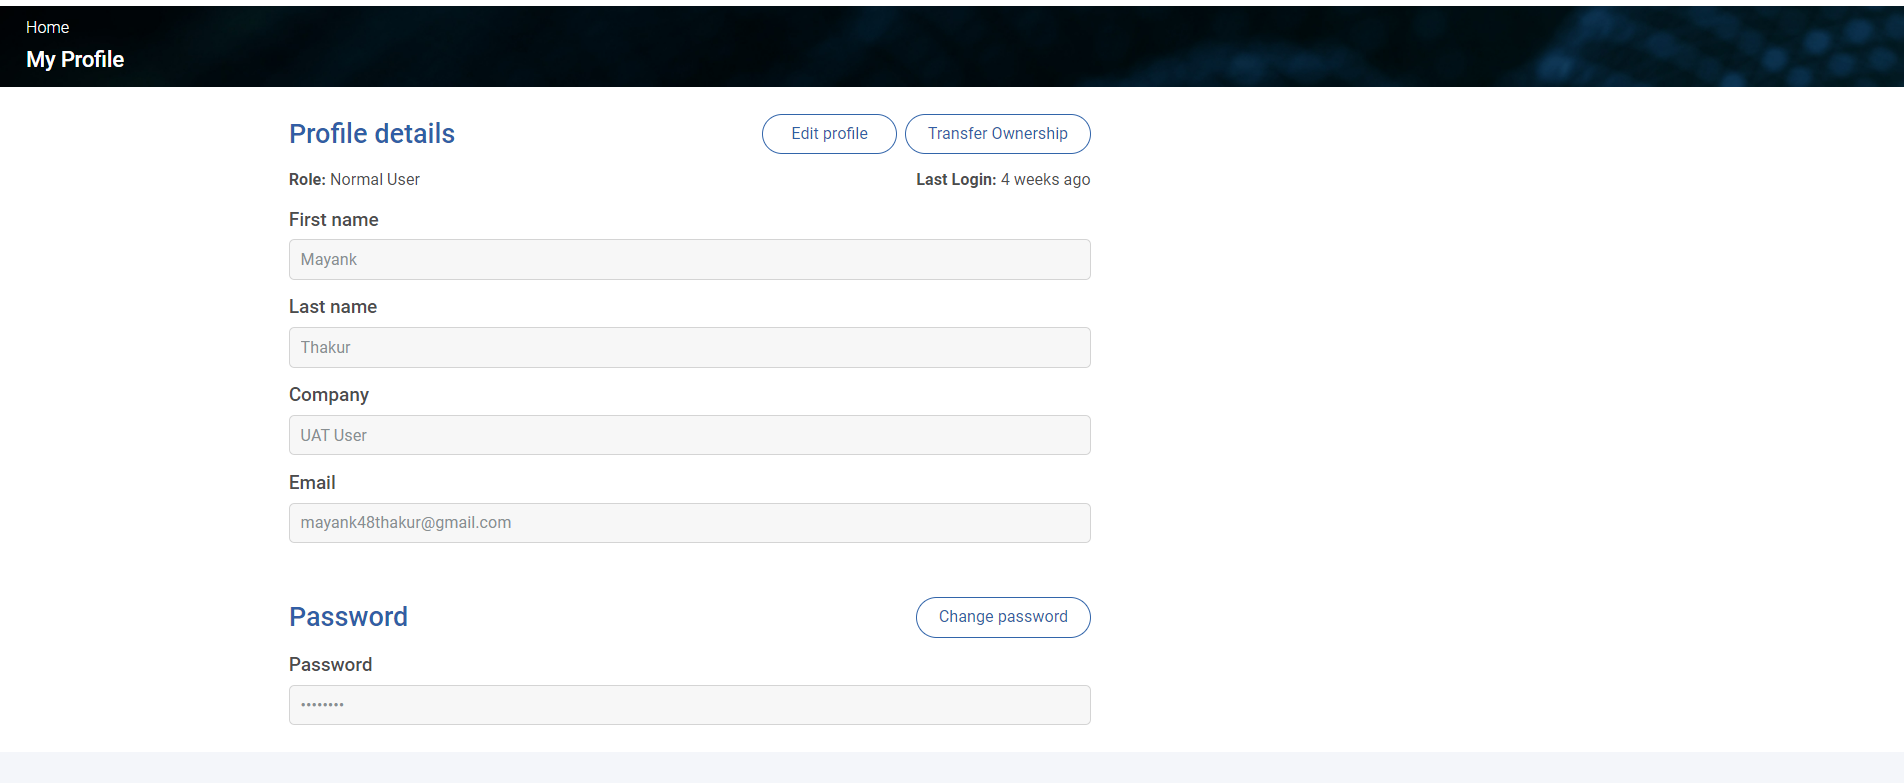
The My Profile section will display all the details of your account such as Role, First name, Last name, Company (client), and Email ID. From the My Profile section users can edit their details, deactivate profile, and transfer ownership to another user. Please refer to the transfer ownership section for more details.
Additionally, Non-Evalueserve users can also change the password of their Insightloupe account from this section. Follow the steps provided below to change your account password:
- Click on your username and select the
My Profileoption. - In the password section, click on the
Change passwordbutton. - Enter your old password, new password and confirm the new password, and click on the Save button.
Deactivate Profile
Follow the steps provided below to set an deactivation date for your profile:
- Click on the username and select the
My Profileoption. - In the
Deactivation Profilesection, click on theDeactivateoption. - Set the deactivation date as the last working day and click the
Savebutton.
